ff6杰夫卡之塔(Kefka's Tower)图文攻略
2003-09-30 23:43 | Hey_GFinger
其实Kefka's Tower比起凤凰洞来说要简单一些,不过也算是有点难度的迷宫,有时也能见到相关的问题,就把这个也做一下,算是国庆献礼:)
原来我自己的expse记录不小心弄没了,只好调用zsene的现成记录,感谢v2的帮忙:)但是抓出图片的质量就差了不少,希望大家能看清……另外bm火光对这篇攻略做了大量的修正和补充,非常感谢他的帮忙:)
一开始进入,分三队,跟以前一样,当大钩子下来的时候对着钩子按确认可以回去。
先看第一队的行进路线:

这里看似有两条路,其实下面一条路是不能走的,是单线;
继续向前,一直都是单线:

另外第一队在中间一些很短的瓦砾路上会遇见怪物-Doom Dragon(魔神龙)会把hp降为1的招式,其他两队是遇不到的,想学全怒的人要注意了,如下:

第一队在这个场景,遇到的敌人100%是魔神龙|doom dragon|まじんリゅう。
魔神龙身上可以偷到まもりのうでわ(Pod Bracelet),作用是魔防与物防上升。

魔神龙的形貌。本截图上有两只魔神龙。
【注】Meteor并非魔神龙发出的招式。


到了这里被卡住了,换第二队:


这里有两条路,上面的只有一个宝箱
因为我调用的纪录是最终战之前的再用warp出来,所以boss都没了,这里应该是隐藏boss-Atma;另外,在这一个场景,会遇到那个通晓全部青魔法的怪物-Dark Force,外貌与Cyan噩梦中最后一个BOSS(附人体的恶灵)一样,只不过,颜色是黑的。


左边的管子正路,右边的回去

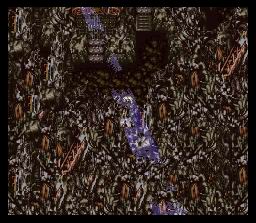
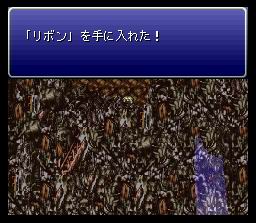
这个地方有两条路:左边的解开第一队的机关,右边的正路

去踩下机关,现在第一队能继续走了。机关右边的宝箱里,是一个ribbon。

回到正路继续走,这个地方是八龙中的金龙

到达会合的地方了,换第三队

一下来就是两条路,左边的路通往一条死路:空中楼梯,尽头有个宝箱;向右拐个弯向下的路才是正路


一直单线走到这里,上面的轮轴是正路,下面有个隐藏宝物:

继续单线走到这里,遇见boss-Inferno:

到这里时记住先开一下左边的宝箱,里面没东西,但第一队的楼梯修好了:

然后从右边的门走,遇见八龙中的骨龙:

也到达会合点了:

换回第一队,一直走到会合点:

左右两队同时踩下机关,中间的门打开,第一队进:

这里向左向右都可以,决定后面打三斗神用的队伍;不过如果错了想重来也可以用warp出去再走一次刚才的路
到了左边,推铁块,推之前记住让下面的闪人!

第二队上来了,这次走右边,同样推铁块前先闪人:


第三队上来,进门,三队同时踩机关,平台升起,从此想再出去只能靠warp了,中间的门也打开了:

第三队进去之前先往回走,踩机关,打开第一、第二队的门:

然后从刚才那里一向里走,就会遇见boss-Guardian,就是以前魔导研究所怎么也打不伤的机器,雷欧将军亦对它无可奈何……
但这次就不怕它了。
继续走到这个地方遇见boss-三斗神中的骑神Poltrgeist:

这里有个隐藏宝物
搞定后再向里面走,最后一个存盘点:

然后从洞里跳下去,到达最终的汇合处;换第一队,出来从旁边的门进:

这个地方打boss-死神Doom:

向前走到最终汇合处,换第二队,跟第一队的走法一样(对称),在这个地方打boss-女神Goddess:

三队都到汇合处了,调整好装备以后同时踩下机关,就是最后的战斗了!

-
原来我自己的expse记录不小心弄没了,只好调用zsene的现成记录,感谢v2的帮忙:)但是抓出图片的质量就差了不少,希望大家能看清……另外bm火光对这篇攻略做了大量的修正和补充,非常感谢他的帮忙:)
一开始进入,分三队,跟以前一样,当大钩子下来的时候对着钩子按确认可以回去。
先看第一队的行进路线:
这里看似有两条路,其实下面一条路是不能走的,是单线;
继续向前,一直都是单线:
另外第一队在中间一些很短的瓦砾路上会遇见怪物-Doom Dragon(魔神龙)会把hp降为1的招式,其他两队是遇不到的,想学全怒的人要注意了,如下:
第一队在这个场景,遇到的敌人100%是魔神龙|doom dragon|まじんリゅう。
魔神龙身上可以偷到まもりのうでわ(Pod Bracelet),作用是魔防与物防上升。
魔神龙的形貌。本截图上有两只魔神龙。
【注】Meteor并非魔神龙发出的招式。
到了这里被卡住了,换第二队:
这里有两条路,上面的只有一个宝箱
因为我调用的纪录是最终战之前的再用warp出来,所以boss都没了,这里应该是隐藏boss-Atma;另外,在这一个场景,会遇到那个通晓全部青魔法的怪物-Dark Force,外貌与Cyan噩梦中最后一个BOSS(附人体的恶灵)一样,只不过,颜色是黑的。
左边的管子正路,右边的回去
这个地方有两条路:左边的解开第一队的机关,右边的正路
去踩下机关,现在第一队能继续走了。机关右边的宝箱里,是一个ribbon。
回到正路继续走,这个地方是八龙中的金龙
到达会合的地方了,换第三队
一下来就是两条路,左边的路通往一条死路:空中楼梯,尽头有个宝箱;向右拐个弯向下的路才是正路
一直单线走到这里,上面的轮轴是正路,下面有个隐藏宝物:
继续单线走到这里,遇见boss-Inferno:
到这里时记住先开一下左边的宝箱,里面没东西,但第一队的楼梯修好了:
然后从右边的门走,遇见八龙中的骨龙:
也到达会合点了:
换回第一队,一直走到会合点:
左右两队同时踩下机关,中间的门打开,第一队进:
这里向左向右都可以,决定后面打三斗神用的队伍;不过如果错了想重来也可以用warp出去再走一次刚才的路
到了左边,推铁块,推之前记住让下面的闪人!
第二队上来了,这次走右边,同样推铁块前先闪人:
第三队上来,进门,三队同时踩机关,平台升起,从此想再出去只能靠warp了,中间的门也打开了:
第三队进去之前先往回走,踩机关,打开第一、第二队的门:
然后从刚才那里一向里走,就会遇见boss-Guardian,就是以前魔导研究所怎么也打不伤的机器,雷欧将军亦对它无可奈何……
但这次就不怕它了。
继续走到这个地方遇见boss-三斗神中的骑神Poltrgeist:
这里有个隐藏宝物
搞定后再向里面走,最后一个存盘点:
然后从洞里跳下去,到达最终的汇合处;换第一队,出来从旁边的门进:
这个地方打boss-死神Doom:
向前走到最终汇合处,换第二队,跟第一队的走法一样(对称),在这个地方打boss-女神Goddess:
三队都到汇合处了,调整好装备以后同时踩下机关,就是最后的战斗了!
-